


Install NetExplorer Drive
To install NetExplorer Drive on your computer :
- Go to our site and select NetExplorer Drive : the tool for setting up a WebDav Drive.
- Launch the installer.
- Fill-in platform URL and credentials :
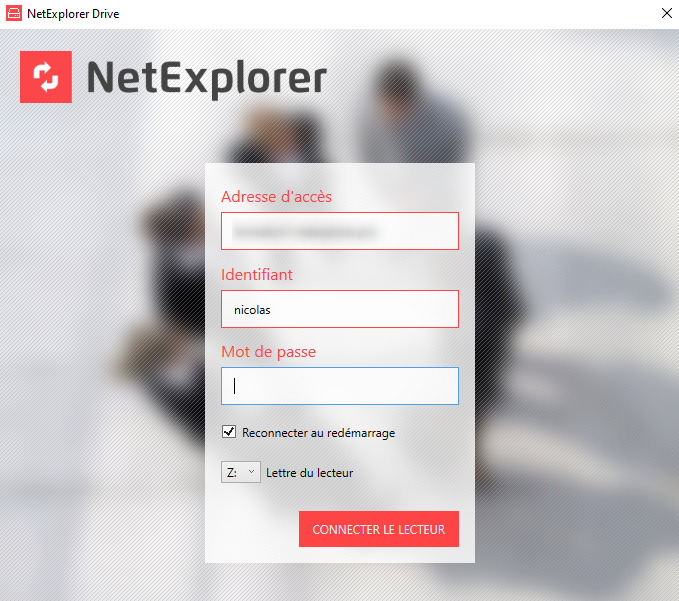
- Platform URL (such as https://nameofyourplatform.netexplorer.pro )
- Login (e.g. first name.name )
- Password or application password.
- Click on CONNECT DRIVE.
➔ You just connected your drive.
 For video tutorial, click here !
Notes
- Application password allows you to connect your Network drive with :
- an account from external directory or method (example: Office365)
- an account with double authentication.
[How to set up application password]
- Step "connect drive" can take more time on some computers where antivirus protection has been set up, especially if a scan of hard drives is activated.
Download failure
To avoid download failures on Office documents, we strongly advise to set up this way :
- From startup menu, type "download center. From the Start menu, type Office Upload Center. The latter opens .
- Click on 
- In the Display Options section, check all the options.
- In the Cache settings section: fill in the value 2 for the option How long to keep files in the Office Document Cache and check Delete files from the Office Document Cache when they are closed .
- Click OK.
NET USE command and NetExplorer Drive
Compared to a NET USE command, NetExplorer Drive can mount a network drive while bypassing some Windows limitations. This avoids disconnections without automatic reconnections, Windows does not systematically request the user's connection information,...
You can also always choose the letter on which the network drive will be installed.